m (Undid an error I made with the table of contents and fixed the wording of the campaign map reward.) Tags: Visual edit apiedit |
No edit summary Tag: Visual edit |
||
| (One intermediate revision by the same user not shown) | |||
| Line 1: | Line 1: | ||
| − | [[File:Aquanoscard.png|right|300px]] |
+ | [[File:Aquanoscard.png|right|300px]]'''{{PAGENAME}}''' is a map that was released as part of the [[Part 3: Aquanos]] DLC on 26 April 2012. |
| − | The map is a large underwater town with |
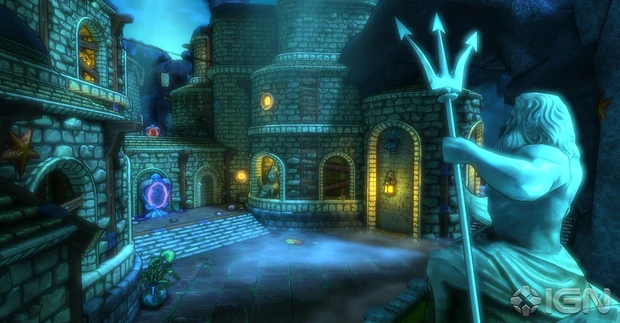
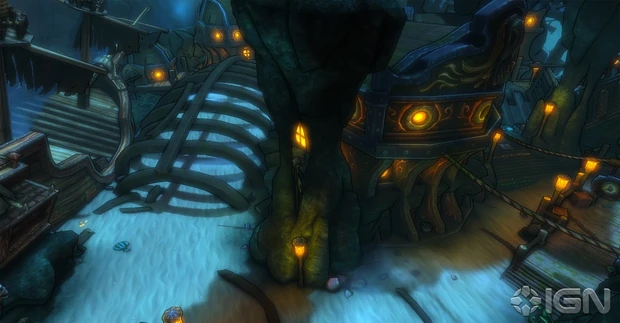
+ | The map is a large underwater town with [[Sharken]], [[Fish Wyvern|Fish Wyverns]], and a [[Kraken]] boss. Similar to [[Moraggo Desert Town]], Aquanos features colored portals which allow players to quickly travel across key points of the large-sized map. |
| − | |||
| − | Similar to [[Moraggo Desert Town]], the map features colored portals which allow players to quickly travel across key points of the large-sized map. |
||
| − | |||
| ⚫ | |||
| ⚫ | |||
==Rewards== |
==Rewards== |
||
| Line 15: | Line 12: | ||
===Pets=== |
===Pets=== |
||
| − | * |
+ | *The Seahorse pet is rewarded for reaching wave 20 in [[Survival|Survival Mode]]. |
Not on console |
Not on console |
||
| Line 25: | Line 22: | ||
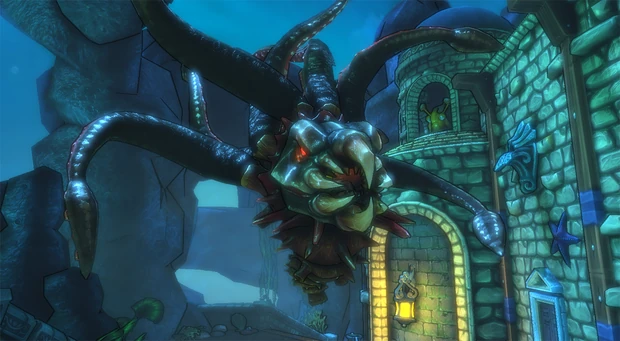
*Defeating the [[Kraken]] boss will allow players to retrieve the [[Eternia Shard Recovered: Yellow|Yellow Eternia Shard]]. A trophy resembling one of the [[Kraken]]'s teeth will appear in the player's [[tavern]]. |
*Defeating the [[Kraken]] boss will allow players to retrieve the [[Eternia Shard Recovered: Yellow|Yellow Eternia Shard]]. A trophy resembling one of the [[Kraken]]'s teeth will appear in the player's [[tavern]]. |
||
*Retrieve all four Lost Eternia Shards ([[Eternia Shard Recovered: Purple|Purple]], [[Eternia Shard Recovered: Blue|Blue]], [[Eternia Shard Recovered: Yellow|Yellow]] and [[Eternia Shard Recovered: Red|Red]]) to unlock access to the [[Crystalline Dimension]] through a tavern portal. |
*Retrieve all four Lost Eternia Shards ([[Eternia Shard Recovered: Purple|Purple]], [[Eternia Shard Recovered: Blue|Blue]], [[Eternia Shard Recovered: Yellow|Yellow]] and [[Eternia Shard Recovered: Red|Red]]) to unlock access to the [[Crystalline Dimension]] through a tavern portal. |
||
| − | |||
| − | ==Notes== |
||
| − | *[[Seahorse]]s and [[Snail]]s can be found on the map as well. They behave like the [[Shroomite|Shroomite ]]NPCs. |
||
| − | *There are a total of 2 [[Seahorse]]s and 2 [[Snail]]s scattered around the map. |
||
===Strategies=== |
===Strategies=== |
||
Revision as of 13:31, 25 February 2020
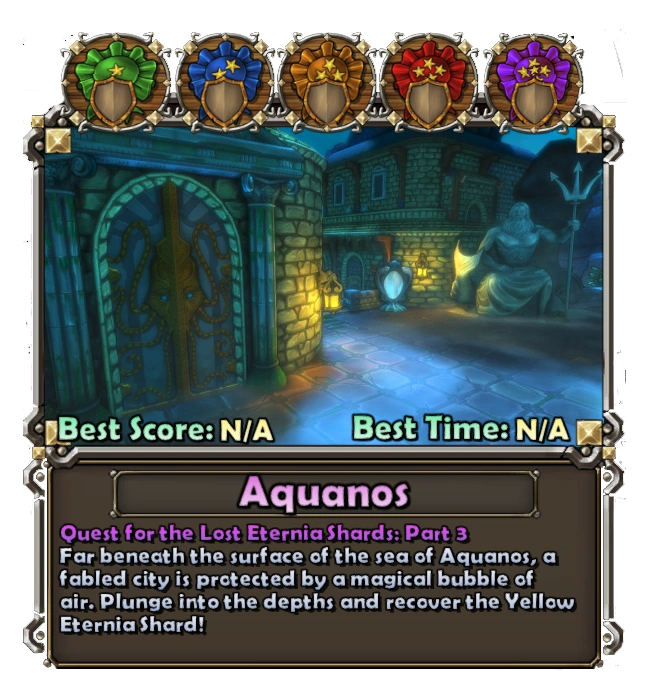
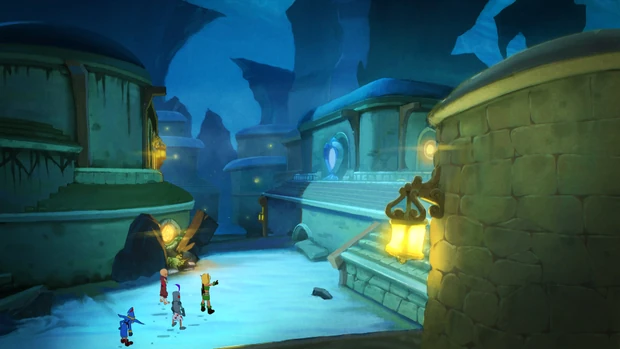
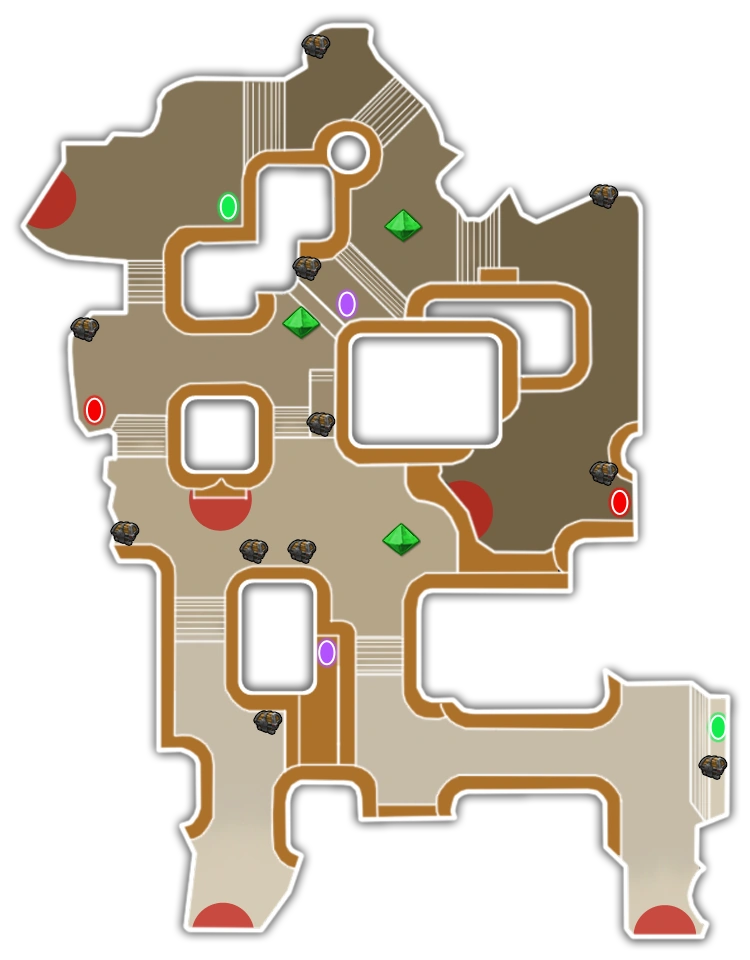
Aquanos is a map that was released as part of the Part 3: Aquanos DLC on 26 April 2012.
The map is a large underwater town with Sharken, Fish Wyverns, and a Kraken boss. Similar to Moraggo Desert Town, Aquanos features colored portals which allow players to quickly travel across key points of the large-sized map.
Two Seahorses and Snails are scattered across the map. They act similar to treasure chests. They can be "Pet" once per round, and drop mana. As well, they may heal the hero or deposit an item directly into the player's item box. The item's quality depends on the set difficulty.
Rewards
Costumes
- Complete the campaign version of the map to unlock a new skin for the Countess, the Mermaid Costume.
Pets
- The Seahorse pet is rewarded for reaching wave 20 in Survival Mode.
Not on console
Items
Players are awarded a class weapon and a random piece of armor. The potential quality of both items is dependent on the attempted difficulty.
Eternia Shard
- Defeating the Kraken boss will allow players to retrieve the Yellow Eternia Shard. A trophy resembling one of the Kraken's teeth will appear in the player's tavern.
- Retrieve all four Lost Eternia Shards (Purple, Blue, Yellow and Red) to unlock access to the Crystalline Dimension through a tavern portal.
Strategies
Media
Map Details
 |
Map Information | ||||||||||||||
|---|---|---|---|---|---|---|---|---|---|---|---|---|---|---|---|
| Number of Crystals | Number of Waves | Defense Units | Starting Mana | ||||||||||||
| 12 | 160 | 1700 | |||||||||||||
| Hazards | Mana Per Round | ||||||||||||||
| Falling Off Ledges | 1400 | ||||||||||||||
| Challenges | |||||||||||||||
| N/A | |||||||||||||||
| Spawn List | |||||||||||||||
|
| |||||||||||||||
|
| |||||||||||||||
| Bosses | |||||||||||||||
|
| |||||||||||||||
| Rewards | |||||||||||||||
| PC | |||||||||||||||
| Easy | Medium | Hard | Insane | Nightmare | |||||||||||
| Squire & Countess Aquian Cog-Maul Apprentice & Adept Xilent's Rhythm Staff Huntress & Ranger Pressurized Energy Core Monk & Initiate Kelp Harvester |
Squire & Countess Aquian Cog-Maul Apprentice & Adept Xilent's Rhythm Staff Huntress & Ranger Pressurized Energy Core Monk & Initiate Kelp Harvester |
Squire & Countess Aquian Cog-Maul Apprentice & Adept Xilent's Rhythm Staff Huntress & Ranger Pressurized Energy Core Monk & Initiate Kelp Harvester |
Squire & Countess Triton's War Glaive Apprentice & Adept Arronax Huntress & Ranger The Depth Charge Monk & Initiate Lemurian Halberd |
Squire & Countess Triton's War Glaive Apprentice & Adept Arronax Huntress & Ranger The Depth Charge Monk & Initiate Lemurian Halberd | |||||||||||
| Survival Rewards | |||||||||||||||
| N/A | |||||||||||||||