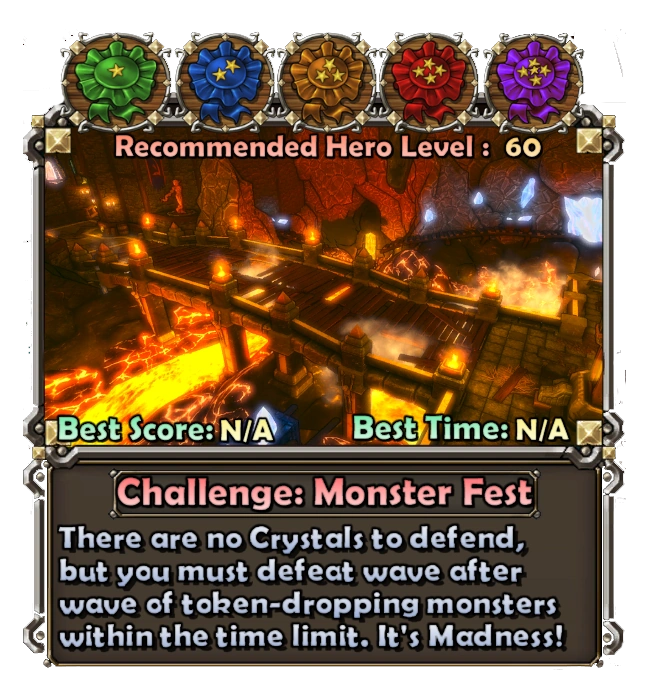
Monster Fest is a challenge that takes place in Glitterhelm Caverns.
The goal of the challenge is for the party to avoid running out of lives while completing each wave within the allotted time, rather than having to defend the Eternia Crystals. The party starts the challenge with a fixed number of lives shared among the members. To complete the challenge, at least one party member must survive the final wave by defeating all enemies within the time limit. As the wave number increases, so does the time, difficulty, and number of enemies. Monster Fest is the first challenge that does not involve Eternia Crystals.(Aside from "Unlikely Allies")
In mobile version, the map for this challenge is Oakvale Crossing.
The party's resistance bonuses and hero health bonuses play a key role in their tactics and survival. Most players will find the Fairy Familiar invaluable to keeping them alive whilst fending off the onslaught of enemies. This challenge can be tricky, as many tower-only strategies will not kill all of the enemies within the time limit, and as such often requires at least one hero with powerful DPS.
PC and Console
Notes
On the PC/Console version, the Monster Fest challenge was moved from Oakvale Crossing to Glitterhelm Caverns. Unlike the Mobile version, the PC and console versions do not reward the Fairy familiar for completing this challenge on Hard or Insane difficulties.
Requirements
In order to unlock this challenge on the PC version, players must:
- Complete the map Glitterhelm Caverns to unlock this Challenge.
Mobile
In order to unlock this challenge on the mobile version, players must:
- Complete The Throne Room in version 2.0 or later (to unlock Oakvale Crossing)
- Complete Oakvale Crossing
Strategies
Aura Monk + DPS Huntress + Fairy
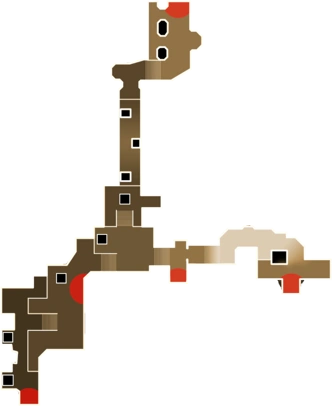
This challenge can be soloed on Insane with a powerful Huntress, an aura Monk, and a fairly good Fairy familiar. At the beginning of the challenge, the Monk can pick up the two nearby mana chests and travel to the middle of the North bridge (the wooden bridge with gaps over the lava). Once there, he can quickly drop a Healing Aura and, if time allows, a Strength Drain Aura. Then, the Monk is switched out for the Huntress (casting rate and movement speed are helpful stats in this process). The huntress can complete the wave by trying to stay under the auras and gunning everything down--the monsters will be corralled into nice long lines that are easy to pierce.
At the end of the wave, drop some mana and wait right next to where the Forge will pop up. The moment it does so, switch to the Monk again and drop an Ensnare and Lightning on top of the previous two. If time allows, put another set of auras to the South (where the majority of monsters will come from), directly adjacent to the first set. Once again, switch to the Huntress and gun everything down, using the Healing Auras and Fairy to keep you alive. Watch out for the lava gaps! Note: it may be easier to play the first wave on monk to place more auras. Ogres begin on the second wave, so you don't desperately need DPS on the first one. Also, basing your defense where you spawn rather than on the bridge will prevent deaths from lava.
One issue with this strategy is time, because of the ensnare auras. To combat this, once you approach 1:30 or so remaining on the last wave, the Southern ensnare should be dropped (if you can't localize it, just sell as many auras as necessary) and the Huntress should proactively hunt down the last remaining monsters. Another solution is to extend electric auras beyond the aura smorgasbord you're staying in. If done correctly, and with a little luck, there should be around 10-40 seconds remaining when the last monster goes down.
This strategy is most effective with a well-equipped Huntress with at least 60-80k dps and an aura monk with 100+ Aura Radius. Even solo, Ogres will have 600k+ HP, so greater DPS and more time spent under auras is preferable. Naturally, more powerful Fairies are preferable, but the bare minimum is likely to be around 150 HP per heal, 5 heal speed. This is usually obtained by upgrading a Fairy to at least 2/3 of max. Upgrading physical damage resistance on armor is also not a bad idea, as it prevents deaths to sudden hordes of warriors jumping on your head and doing more spike damage than your fairy can deal with.
Solo squire towerbuild
With decent tower stats, a squire can fairly easily solo it on nightmare. Build up at the top of the stairs bottom right. For example, like this. You can fairly easily fit 12 or more bowling ball turrets at the top of those stairs and they can roll quite far. Everything else is just to support that, some cover against the attackers coming from the back, walls to keep stuff at bay and harpoons against warriors and flyers. Things to watch out for:
- Warriors jumping in between your turrets, they're close together a warrior can damage several of them at the same time.
- You get 15 seconds before wave starts on insane and nightmare.
- Kobolds (the exploders) will problably damage your barricades a bit.
- Sometimes the healers hide around a corner. On nightmare they might easily kill your towerbuilder, so if you don't want to take risks, just sell one harpoon and then place it so it can fire at the healers without you ever coming in harms way. You can place it back in its spot in between the waves.
| Recommended Level: 60 | Challenge Information | |||||||||||||||||||||||||||||
|---|---|---|---|---|---|---|---|---|---|---|---|---|---|---|---|---|---|---|---|---|---|---|---|---|---|---|---|---|---|---|
 | ||||||||||||||||||||||||||||||
| Number of Crystals | Number of Waves | |||||||||||||||||||||||||||||
| N/A | 10 | |||||||||||||||||||||||||||||
| Defense Units | Starting Mana | |||||||||||||||||||||||||||||
| 165 | 1000 | |||||||||||||||||||||||||||||
| Hazards | Mana Per Round | |||||||||||||||||||||||||||||
| Lava | - | |||||||||||||||||||||||||||||
| Spawn List | ||||||||||||||||||||||||||||||
Template:Map information/EnemyTemplate:Map information/EnemyTemplate:Map information/EnemyTemplate:Map information/EnemyTemplate:Map information/EnemyTemplate:Map information/EnemyTemplate:Map information/EnemyTemplate:Map information/EnemyTemplate:Map information/EnemyTemplate:Map information/EnemyTemplate:Map information/EnemyTemplate:Map information/Enemy
| ||||||||||||||||||||||||||||||